
We had a patient last spring who’d been wearing the same pair of hearing aids for six years. Six. We expect three to five from most devices. When we asked her secret, she shrugged and said, “I clean them every Sunday morning before I have my coffee. Takes me about ten minutes.” That was it. Same brand, same model thousands of our patients wear. The only difference between her six-year aids and the patients who burn through devices in three was the Sunday-morning ritual.
Hearing aids are tiny computers that live inside the warmest, waxiest, most humid part of your body for 14 hours a day. They’re durable. They’re also not invincible. A short weekly routine is what doubles their lifespan and prevents 80 percent of the repair visits we see.
Here’s the routine. Build it into a part of your week you don’t skip — Sunday morning, Saturday after lunch, whatever sticks.
What you’ll need on the counter
Pull these together once and keep them in a small basket or a drawer near where you do the routine. Setup is the part people skip.
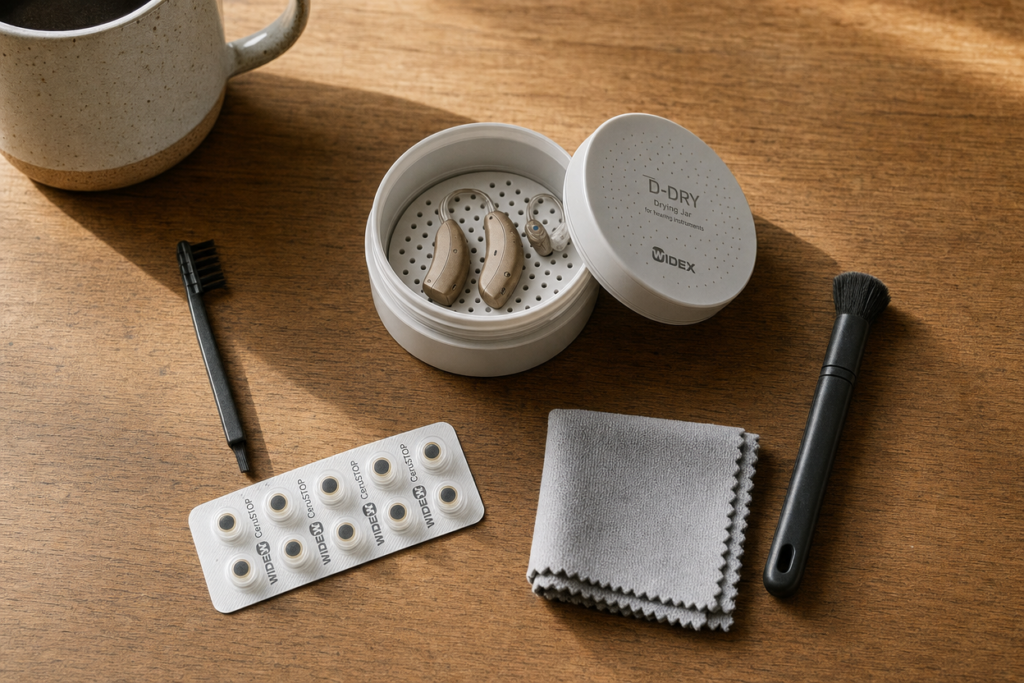
- A soft, dry microfiber cloth (the kind that comes with eyeglasses works)
- A soft-bristled cleaning brush (usually included with your hearing aids — if you’ve lost yours, a clean, dry, soft-bristled toothbrush works)
- Wax filter replacements for your specific model
- Replacement domes (if you wear RIC-style aids — most modern ones)
- Your dehumidifier or desiccant drying jar
- A bright light source — a kitchen counter under a pendant light is perfect
Total cost to assemble: under $30, including replacements you’ll go through over months.
Step 1 — Wipe down the whole device
This is the most important step. Hold the hearing aid over a clean surface (a kitchen towel works) and wipe the entire outer body with the dry microfiber cloth. Pay attention to the part that sits behind your ear, where skin oil and sweat collect, and the spot where the wire enters the device.
Do NOT use water, alcohol wipes, baby wipes, or any kind of cleaning spray. The seals on a hearing aid are made for body sweat and rain — they’re not made for cleaning chemicals. Alcohol in particular can damage the rubber gaskets and degrade the seals over months.
Just a dry cloth. That’s all it needs.
Step 2 — Brush the microphone ports
Look closely at the top of the hearing aid (the side that faces up when it’s on your ear). You’ll see one or two tiny holes — those are the microphone ports. They look small because they are. They also clog easily.
Hold the hearing aid upside down (microphone ports facing the floor) and gently brush the ports with the soft brush. The downward angle lets gravity carry any debris OUT instead of pushing it deeper. Brush for about 10 seconds per side. Don’t poke anything into the ports — a brush, gently, is all you want.
If the ports look discolored, glossy, or “filled in” with material that doesn’t brush off, that’s a sign that sunscreen, sweat, or skin oil has built up. Bring the device in. We have a vacuum tool that handles it safely.
Step 3 — Check the wax filter
Hold the hearing aid so you can see the receiver tip (the end that goes into your ear). The wax filter is the small white or colored disk at the very end. Look at it under a bright light.
- Clean white filter — keep it
- Yellow, brown, or noticeably discolored — replace it
- Visibly clogged with wax — replace it immediately
Replacing a filter takes about 30 seconds once you’ve done it twice. Every manufacturer has a small replacement tool that pulls the old filter out and inserts a new one. If you’ve lost yours, swing by — we’ll send you home with a fresh pack and the tool.
Most patients should change wax filters every two to four weeks. Some need weekly. If you’re constantly clogging filters, your ears may be producing more wax than average, which is worth a conversation. Our troubleshooting guide has more on this.
Step 4 — Inspect the dome
For RIC (receiver-in-canal) aids, the dome is the soft silicone tip that seals against your ear canal. Look at it under your light source.
- Clean and intact — keep it
- Cracked, split, or stretched — replace it
- Discolored or stiff — replace it
- Missing — definitely replace it (and check whether it’s still in your ear canal — if you’re not sure, don’t dig, just come in)
Domes are inexpensive and come in different sizes. If your fit has been feeling loose or whistly, ask us about a dome size change at your next visit. The wrong size dome is one of the most common causes of “my hearing aid isn’t working as well as it used to.”
Step 5 — Check the receiver wire and tubing
Run your fingers gently down the wire (or tube, for older models) that connects the main device to the receiver in your ear. Feel for any kinks, bends, or stiff spots. Look closely where the wire enters both the device and the receiver — that’s where it most often gets stressed.
If the wire has any visible damage, schedule a visit. Wires are inexpensive to replace and we keep them in stock for every brand. If you wait, a damaged wire usually fails completely at a bad time — middle of dinner, halfway through a hike. Better to catch it on Sunday.
Step 6 — Clean the charging contacts (rechargeable users)
If you wear rechargeable lithium aids, the small metal contacts on the bottom of each device are what touch the charging case to deliver power. Over time, skin oil and microscopic earwax dust accumulate on them and reduce charging efficiency.
Wipe both sets of contacts with the dry microfiber cloth. Ten seconds per device. Then wipe the corresponding contacts inside the charging case — gently, with the same cloth. Don’t use any liquid. Done.
This single step solves about 30 percent of “my charger isn’t working” complaints we get.
Step 7 — Drying time
Put the cleaned hearing aids in your dehumidifier or desiccant drying jar for at least two hours. Better, overnight. This is the step that pulls humidity out of the deep crevices where your cloth can’t reach.
If you don’t have a drying device yet — get one. In WNC, the humidity makes it not optional. Electric dehumidifiers run $50 to $120 and last for years. We sell several models in the office and we’ll match you to one that fits your device.
For more on humidity and our climate, our summer care for hearing aids guide covers the details.
What to write down
Once a month, write down a couple of things:
- The date of your last full cleaning
- Whether you changed the wax filters this round
- Anything that felt different — a quieter side, a whistling that wasn’t there before, a battery drop you didn’t expect
Bring that little log to your next office visit. It helps us catch patterns we can’t see in a 30-minute appointment. Patients who do this end up with longer-lasting devices and fewer surprise repairs.
What to leave to us
There are a few things you should NOT do at home, no matter what you see on YouTube:
- Soak the device in any liquid (water, alcohol, anything)
- Try to remove a stuck dome from your ear canal with anything sharp
- Open the device case with a small screwdriver to “see what’s inside”
- Use compressed air or canned air on the microphone ports
- Replace anything other than wax filters and domes
Anything beyond that is what we’re here for. Every brand we work with — Phonak, Oticon, ReSound, Starkey, Unitron, Signia, Widex — has its own quirks for deeper cleaning, and we have the tools and training to handle them. Most quick maintenance visits take 10 to 15 minutes and there’s no charge for our existing patients.
Come Experience Hearing for yourself
If your devices haven’t had a deep cleaning in over six months, schedule one. It’s the single best investment in keeping your aids working through year three, four, and five. Read the full living-with-hearing-aids guide for everything else.
Come Experience Hearing for yourself — call (828) 274-6913 to schedule at our Asheville or Hendersonville office. We’ll clean them, check them, and send you home with whatever supplies you need.