
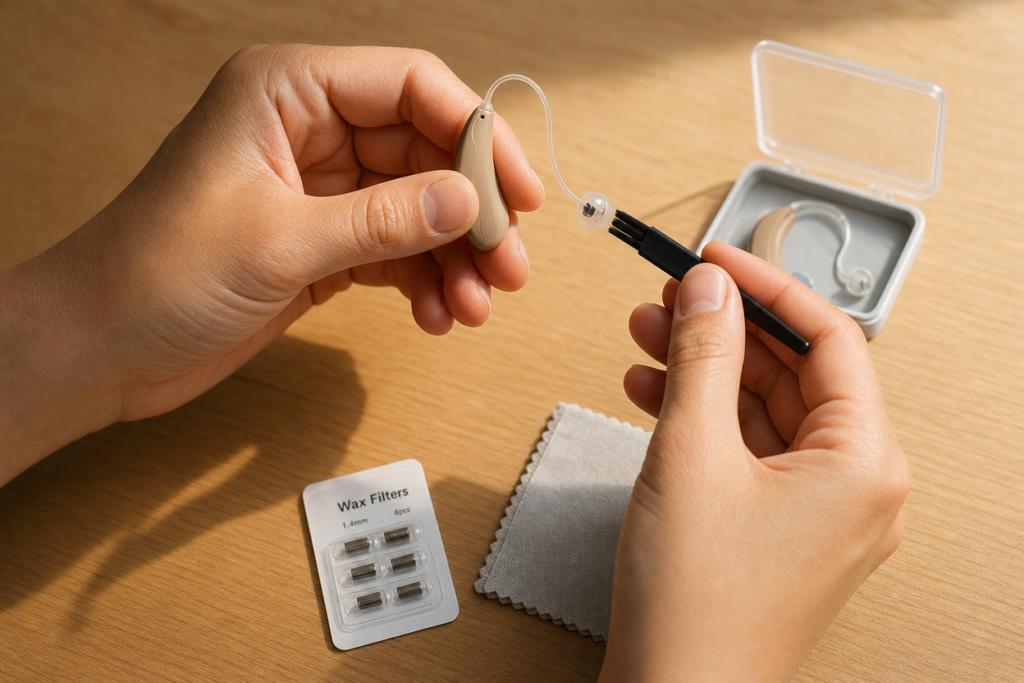
A patient called us on a Tuesday morning a few weeks back, certain his right hearing aid had finally died. He’d had it for almost five years and he was bracing himself for the cost of a new pair. We had him drive over. Three minutes after he walked in the door, his hearing aid was working again. The wax filter was completely blocked.
This is the most common call we get. Not “my hearing aids stopped working” — “I think my hearing aids broke.” Nine times out of ten, they didn’t break. Something simple went wrong, and most of these you can fix at your kitchen table in under five minutes.
Here’s the order to work through. Start at the top and stop when something solves the problem.
Step 1 — Check the wax filter
This is the single most common cause of a hearing aid sounding weak, muffled, or completely silent. The wax filter is the tiny disposable mesh screen that sits between your ear canal and the receiver (speaker) of your hearing aid. It catches earwax before it can clog the receiver itself. The filter is doing its job perfectly when it’s the thing that fails — that’s what it’s designed to do.
Filters need changing every two to four weeks depending on how much wax your ears produce. Some patients change them monthly. Some patients change them weekly. There’s no shame in either schedule — it’s just biology.
If your hearing aid sounds weak or silent, swap the filter first. Every manufacturer has its own filter type and replacement tool — yours came with a small package of spares and a swap tool the size of a toothpick. If you’ve lost the package or can’t remember how to do it, stop in. We’ll show you in two minutes and send you home with a fresh pack.
If a new filter fixes it — you’re done. If it doesn’t, keep going.
Step 2 — Check the dome
The dome is the soft silicone tip that sits inside your ear canal. It can crack, stretch, fall off inside your ear, or just get plain gunky. If the dome is missing or split, the hearing aid will sound thin, tinny, or whistle constantly.
Look at the dome under a bright light. Replace it if you see any cracking, splitting, or stretching. Replace it always if there’s no dome at all — and yes, sometimes domes get left behind in your ear canal. If you suspect that’s what happened, do not dig for it with anything sharp. Come see us. We’ll get it out safely in 30 seconds.
Step 3 — Check the battery or charge
If you wear traditional zinc-air batteries, even a battery that “looks fine” can be dead. They lose charge in humid weather, when stored too long, or if the seal sticker was removed too early. Pop in a fresh battery from a new pack and give it 30 seconds to activate (zinc-air needs about a minute of air exposure before it reaches full voltage).
If you wear rechargeable aids, set them in the charger and look for the indicator light. If the light doesn’t come on:
- Check the wall outlet (try a different one)
- Check the cable (try a backup if you have one)
- Check the contacts on the bottom of the hearing aid for moisture or debris — wipe gently with a dry cloth
A clean charge contact and a working outlet solve most “the charger isn’t working” calls before they happen.
Step 4 — Check for moisture
WNC humidity does damage you don’t see. If your hearing aid has been working for months and suddenly sounds intermittent, crackly, or distorted, moisture is very often the cause. Open the battery door (if applicable), wipe the device down with a dry microfiber cloth, and put it in a dehumidifier or desiccant jar for at least four hours. Overnight is better.
If you don’t have a drying device, put the aids in a small sealed container with a pack of silica gel (the little packets that come with new shoes or vitamins) and leave them for 24 hours. It’s not as good as an electric dehumidifier but it’ll often pull enough moisture out to get the aid working again.
For more on moisture and our climate, see our summer care for hearing aids guide.
Step 5 — Check the program
Modern hearing aids have multiple listening programs — quiet, restaurant, outdoor, music, sometimes a manual TV setting. If you’ve fiddled with the buttons or accidentally bumped a setting, the device might be on the wrong program for the environment you’re in.
Most aids have a button on the device itself (often a small push-button on the upper edge) that cycles through programs. Press it once and listen. If the sound changes, keep pressing until you find the one that matters. If you have a smartphone app for your hearing aids, you can also reset to the default program from there.
If you cycle through and nothing sounds right, the device may have lost its custom settings. That’s a 10-minute fix in the office.
Step 6 — Check the receiver wire
For RIC (receiver-in-canal) hearing aids — the most common modern style — the actual speaker sits inside your ear, connected by a thin wire to the main device behind your ear. That wire can get pinched, kinked, or pulled loose. Run your finger gently down the length of the wire and look for any visible damage. Make sure the wire is fully clicked into both ends.
A loose connection at the receiver end is a common cause of intermittent or one-sided sound. If it’s loose, push it firmly back in — it should click. If the wire itself looks damaged, that’s an office visit. Wires are inexpensive and we keep replacements for every brand we work with.
Step 7 — One side only? Try swapping ears
If only one hearing aid is failing, swap them between your ears for a minute. Put the right aid in your left ear and the left aid in your right ear (yes, even though the dome and the receiver length may be slightly different — it works for diagnostic purposes for a couple of minutes).
If the problem follows the device, it’s a device issue. If the problem stays in the same ear, it’s potentially your ear (wax buildup, ear infection, or even a sudden change in your hearing). That second case is worth a call — both to us and possibly to your physician.
Whistling that won’t stop
This one deserves its own note. If your hearing aid is whistling, the cause is almost always one of three things — wax buildup in your ear canal blocking the sound from getting where it should go, a dome that doesn’t seal properly anymore, or a hearing aid that’s not seated correctly in your ear. Try reseating it first (just push gently until it feels right). If that doesn’t work, the dome is probably worn — replace it. If that still doesn’t work, you may have wax buildup and need a quick cleaning. We do that in office and it’s painless.
When to just call us
These are the times to skip the troubleshooting and bring the device in:
- Visible damage to the case or the wire
- A device that’s been dropped or stepped on
- A device that’s been fully submerged in water
- Distorted, garbled, or static-y sound that doesn’t improve after drying
- Any case where you’re working through the list and you’re not confident about a step
We don’t charge for quick checks like this for our existing patients. It’s part of the relationship.
Come Experience Hearing for yourself
If you’ve worked through the list and something still isn’t right, come see us. We’ll figure it out — and we’ll show you what we did so you can fix it yourself next time. Read the full living-with-hearing-aids guide for the bigger picture on day-to-day device life.
Come Experience Hearing for yourself — call (828) 274-6913 to schedule at our Asheville or Hendersonville office. Walk-ins welcome for quick troubleshooting.